Description
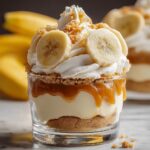
These Delicious No-Bake Banana Pudding Cups combine creamy vanilla pudding, rich cream cheese filling, ripe bananas, and crunchy vanilla wafers in a layered dessert that’s easy to assemble and perfect for any occasion. With no baking required, this cool, creamy treat is refreshing and indulgent, making it a favorite for family gatherings or casual get-togethers.
Ingredients
Scale
Pudding Mixture
- 1 (5.1 oz) box instant vanilla pudding mix
- 3 cups cold whole milk
- 1 teaspoon pure vanilla extract (optional)
Cheesecake Mixture
- 1 (8 oz) package cream cheese, softened
- 1 (14 oz) can sweetened condensed milk
- 1 (12 oz) container whipped topping, thawed (half for mixture, half for topping)
Other Ingredients
- 4–5 ripe bananas
- 1 box vanilla wafers (about 11 oz)
- Extra whipped cream or topping for garnish
- Crushed vanilla wafers for garnish
- Banana slices for garnish
- Caramel drizzle (optional)
Instructions
- Prepare the pudding mixture: In a large mixing bowl, combine the instant vanilla pudding mix and cold whole milk. Whisk thoroughly for 2-3 minutes until the mixture thickens slightly. Optionally, stir in pure vanilla extract for enhanced flavor. Cover and refrigerate for at least 5 minutes to chill.
- Make the cheesecake filling: In another large bowl, beat the softened cream cheese with an electric mixer until smooth and lump-free. Add the sweetened condensed milk and continue beating until fully combined. Gently fold in half of the thawed whipped topping to keep the mixture light and fluffy.
- Slice the bananas: Peel and slice the ripe bananas into approximately ¼-inch thick rounds. To prevent browning, optionally toss banana slices lightly in lemon juice to maintain their bright appearance.
- Assemble the pudding cups: Using your chosen cups or jars, start layering with vanilla wafers at the bottom. Add a layer of banana slices, followed by a layer of the cheesecake mixture, then a layer of the chilled pudding. Repeat the layers until the cups are filled, finishing with the remaining whipped topping spread on top for a smooth finish.
- Chill and garnish: Refrigerate the assembled pudding cups for at least 2-3 hours to allow flavors to meld and the dessert to set. Before serving, garnish each cup with extra whipped cream, crushed vanilla wafers, fresh banana slices, and a drizzle of caramel if desired for added sweetness.
Notes
- For best texture and flavor, use very ripe bananas.
- Lightly tossing bananas in lemon juice prevents discoloration but is optional.
- Make ahead and refrigerate overnight for more developed flavors.
- Use full-fat dairy products for a richer taste.
- The dessert is best served chilled and consumed within 2 days for freshness.