
If you adore the cozy flavors of fall and crave a dessert that’s as impressive as it is easy, this Instant Pot Pumpkin Cheesecake Recipe is going to become your new best friend. Imagine a creamy, spiced pumpkin cheesecake with a perfectly nutty crust, steamed to delicious perfection in your Instant Pot. It’s an absolute showstopper for Thanksgiving, Christmas, or any day you want to bring that warm autumn vibe to the table without hours of fuss. The magic here is how the Instant Pot speeds up the baking process while locking in moisture so every bite is silky and luscious.
Ingredients You’ll Need
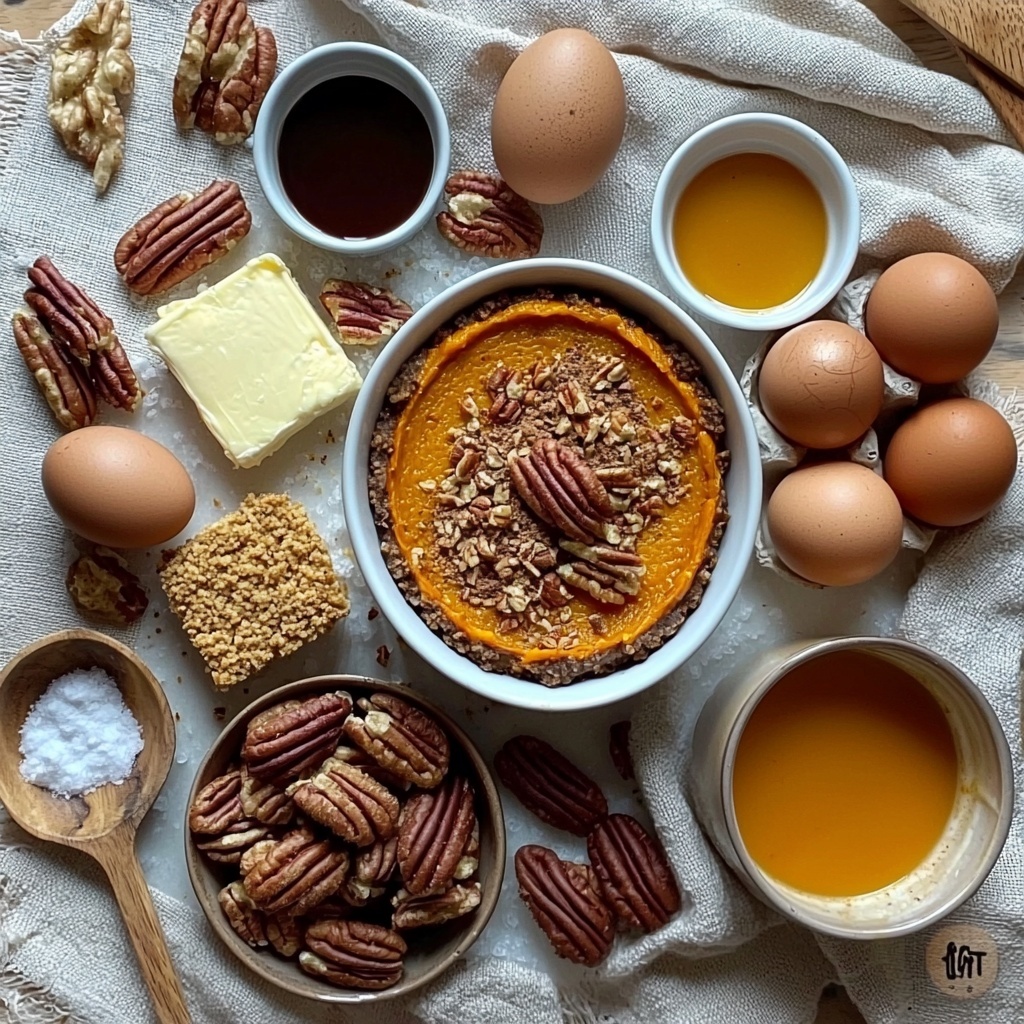
Nothing complicated here—just a handful of simple, wholesome ingredients that combine beautifully to create a cheesecake that’s rich in flavor and just the right texture. Each component plays a vital role, from the buttery pecan crust that adds crunch and warmth to the perfectly spiced pumpkin-infused filling that melts in your mouth.
- Water (1 ½ cups): Essential for creating the steam inside your Instant Pot to gently cook the cheesecake.
- Pecans (¾ cup): Adds a toasty, nutty base for the crust with wonderful texture.
- Graham cracker crumbs (¾ cup): Classic, sweet, and slightly crunchy, they provide the perfect backdrop for the pecans.
- Unsalted butter (¼ cup): Binds the crust together and adds richness without overpowering.
- Light brown sugar (2 Tablespoons for crust + ¼ cup for filling): Brings a subtle caramel sweetness that deepens the flavor profile.
- Ground cinnamon (2 teaspoons for crust + ½ teaspoon for filling): Infuses that signature warm spice that pairs beautifully with pumpkin.
- Cream cheese (10 ounces, softened): The luscious, creamy heart of the cheesecake, delivering that iconic tang and texture.
- Granulated sugar (¼ cup): Balances sweetness and helps achieve a smooth filling.
- Large eggs (2, room temperature): These provide structure and richness to your filling.
- Heavy cream (½ cup, room temperature): Adds silkiness and creaminess to the cheesecake’s body.
- Pumpkin puree (1 cup): The star ingredient that brings natural moisture, color, and pumpkin flavor.
- Vanilla extract (2 teaspoons): Enhances the overall flavor and aroma with a lovely, mellow note.
- Cornstarch (1 Tablespoon): Helps to stabilize the filling so it holds its shape perfectly.
- Nutmeg (½ teaspoon): Adds a gentle, earthy warmth that complements cinnamon and pumpkin.
- Ground ginger (¼ teaspoon): A subtle spice that brightens and adds depth.
How to Make Instant Pot Pumpkin Cheesecake Recipe
Step 1: Prep Your Pan
Start by spraying a 7×3-inch springform pan with nonstick cooking spray. This small step ensures your cheesecake releases effortlessly after cooking, allowing the crust to remain intact and your effort to shine.
Step 2: Make the Crust
Grab your food processor and pulse those pecans until they’re very finely chopped – this nutty base will give a delightful crunch. Then, mix the pecans with graham cracker crumbs, melted butter, brown sugar, and cinnamon until it resembles moist sand. Press this mixture firmly into your prepared pan using a flat-bottomed glass or measuring cup to get an even, packed crust. Freeze the crust for 25 minutes to help it set up nicely before filling.
Step 3: Prepare the Cheesecake Filling
While the crust chills, beat the softened cream cheese together with granulated and brown sugars until light and creamy. This is the foundation of your luscious cheesecake. Gradually add eggs, heavy cream, pumpkin puree, vanilla, cornstarch, and all those lovely spices, mixing until silky smooth. Don’t forget to scrape down the sides to ensure everything is perfectly combined for an even bake.
Step 4: Cover and Cook in the Instant Pot
Remove the crust from the freezer and loosely tent the springform pan with foil—tight on the sides but slightly loose at the top in case the cheesecake rises. Pour your filling over the crust, leaving a small margin at the top. Pour 1 ½ cups of water into the Instant Pot’s inner pot, place the trivet, then carefully set your springform pan on top. Seal the Instant Pot lid and set it to manual high pressure for 40 minutes. Once done, allow the pressure to naturally release for 25 minutes before opening.
Step 5: Cool and Chill
After removing the cheesecake, take off the foil and let it cool on a wire rack for about an hour. Run a knife gently around the edges to release it from the pan. Although the center might still jiggle a bit, it will firm up as it chills. Transfer to the fridge and let it chill for at least 6 hours or overnight to develop that signature cheesecake texture.
How to Serve Instant Pot Pumpkin Cheesecake Recipe
Garnishes
Adding a flourish to your pumpkin cheesecake takes it from delicious to downright show-stopping. Whipped cream is a classic choice for its airy softness, while drizzles of caramel or chocolate provide a beautiful contrast in both flavor and looks. Feel free to sprinkle a pinch of cinnamon on top for that extra cozy fall touch.
Side Dishes
Pair your Instant Pot Pumpkin Cheesecake with light sides like spiced nuts or fresh berries that add bursts of brightness and texture. A hot cup of spiced chai or coffee complements the creamy cheesecake beautifully, making your dessert experience even cozier.
Creative Ways to Present
Try serving individual slices on pretty dessert plates garnished with edible flowers or pumpkin seeds. For a fun twist, scoop a bit of vanilla ice cream alongside, or create mini cheesecakes in mason jars for an adorable and shareable presentation that’s perfect for gatherings.
Make Ahead and Storage
Storing Leftovers
Once chilled, your cheesecake keeps wonderfully in the fridge for up to 5 days. Store it covered tightly with plastic wrap or in an airtight container to preserve freshness and prevent it from absorbing other odors.
Freezing
If you want to save some for later, this Instant Pot Pumpkin Cheesecake Recipe freezes well. Wrap it securely in multiple layers of plastic wrap and then foil, or place slices in freezer-safe containers. When properly stored, it will maintain quality for up to 2 months.
Reheating
Cheesecake is typically best enjoyed chilled, but if you prefer a slightly warmer dessert, let thawed slices sit at room temperature for about 30 minutes. Avoid microwaving as it can change the texture, but a short warm-up can amplify the pumpkin spices and creamy richness.
FAQs
Can I use canned pumpkin puree for this recipe?
Absolutely! Canned pumpkin puree works perfectly and is actually the preferred choice because its smooth texture blends beautifully into the cheesecake filling.
What if my cheesecake cracks after cooking?
Some minor cracking is normal because the Instant Pot steams rather than bakes. To minimize cracks, be sure to avoid overmixing and allow the cheesecake to cool gradually before chilling overnight.
Can I substitute pecans with other nuts in the crust?
Yes! Walnuts or almonds are great alternatives if you’re aiming for a different nutty flavor or texture. Just pulse them finely like the pecans for the best crust consistency.
How do I know when the cheesecake is done in the Instant Pot?
The cheesecake should be set around the edges with a slight jiggle in the center. It will firm up as it cools and chills, so don’t worry if it seems a bit soft at first.
Is it necessary to use cornstarch in the filling?
Cornstarch acts as a stabilizer, helping the cheesecake hold its shape without cracking or becoming too runny. It’s a small addition that makes a big difference in texture.
Final Thoughts
This delightful Instant Pot Pumpkin Cheesecake Recipe is a game changer for busy bakers who want all the warmth and flavor of traditional pumpkin cheesecake without the long wait. It’s rich, creamy, and vibrantly spiced, and the Instant Pot does the heavy lifting so you can relax and enjoy the seasonal vibes. Whether it’s a holiday celebration or just a treat for yourself, I wholeheartedly encourage you to give this recipe a try—you’ll find yourself reaching for it season after season.
Print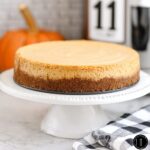
Instant Pot Pumpkin Cheesecake Recipe
- Prep Time: 10 minutes
- Cook Time: 1 hour 5 minutes
- Total Time: 7 hours 15 minutes
- Yield: 8 servings
- Category: Dessert
- Method: Instant Pot
- Cuisine: American
Description
This Instant Pot Pumpkin Cheesecake is a creamy, rich dessert perfect for fall, Thanksgiving, and Christmas gatherings. Made with a crunchy pecan graham cracker crust and a spiced pumpkin-infused cream cheese filling, it cooks flawlessly every time using an Instant Pot for a perfectly smooth texture.
Ingredients
For the Crust:
- ¾ cup pecans
- ¾ cup graham cracker crumbs
- ¼ cup unsalted butter, melted
- 2 Tablespoons light brown sugar, packed
- 2 teaspoons ground cinnamon
For the Filling:
- 10 ounces cream cheese, softened
- ¼ cup granulated sugar
- ¼ cup light brown sugar, packed
- 2 large eggs, room temperature
- ½ cup heavy cream, room temperature
- 1 cup pumpkin puree
- 2 teaspoons vanilla extract
- 1 Tablespoon cornstarch
- ½ teaspoon ground cinnamon
- ½ teaspoon ground nutmeg
- ¼ teaspoon ground ginger
For Serving (Optional):
- Whipped cream
- Caramel drizzle
- Chocolate drizzle
Instructions
- Prepare the Pan: Spray a 7×3-inch springform pan with nonstick cooking spray to prevent the crust and cheesecake from sticking.
- Make the Crust: Pulse pecans in a food processor until finely ground, then transfer to a small bowl. Add graham cracker crumbs, melted butter, brown sugar, and cinnamon; mix thoroughly until the texture resembles wet sand. Press the mixture evenly into the bottom of the springform pan using a flat-bottomed measuring cup or glass. Freeze for 25 minutes to firm up.
- Make the Pumpkin Cheesecake Filling: While the crust freezes, beat softened cream cheese and both sugars at medium speed using a hand mixer or stand mixer until creamy. Add eggs, heavy cream, pumpkin puree, vanilla extract, cornstarch, and spices; beat until smooth and well combined, scraping down the bowl sides as needed.
- Prep Pan with Foil Lid: Remove the crust from the freezer. Cover the top of the springform pan loosely with a foil ‘lid’—tight around the sides but loose on top to allow room if the cheesecake rises.
- Fill Pan and Cook: Pour the cheesecake filling into the springform pan, leaving about ¼ inch space at the top. Place the foil lid on top. Add 1 ½ cups of water to the Instant Pot, place the trivet inside, then gently place the springform pan on the trivet. Secure the Instant Pot lid with the valve set to “Sealed.” Cook on manual high pressure for 40 minutes, then allow a 25-minute natural pressure release before opening the lid.
- Cool and Chill the Cheesecake: Remove the pan from the Instant Pot and place on a cooling rack, removing the foil lid. Let it cool for about an hour. Run a knife around the edges to loosen the cheesecake. The center may be slightly jiggly but will solidify as it cools. If it stays too soft, cook it in the Instant Pot again for 10 minutes with a 10-minute natural release. Refrigerate for at least 6 hours or preferably overnight before removing from the pan.
- Serve: Serve the cheesecake plain or topped with whipped cream, caramel drizzle, or chocolate drizzle as desired for added flavor and decoration.
Notes
- Ensure cream cheese and eggs are at room temperature to avoid lumps in the batter.
- Tightly sealing the pan with foil helps prevent condensation from dripping onto the cheesecake.
- The cheesecake will be slightly jiggly when removed but will firm up after chilling.
- Use a water bath in the Instant Pot to create a moist cooking environment for even baking.
- Chilling overnight improves the texture and flavor, so plan ahead.
- Optional toppings like whipped cream or drizzles can personalize the dessert.


