“`html
If you are looking for a wholesome, energizing snack that feels like a warm hug in every bite, you will absolutely fall in love with this Homemade No-Bake Oat and Nut Energy Bars Recipe. Combining the natural sweetness of honey or maple syrup with the hearty texture of oats, crispy puffed rice, and a nutty crunch, these bars are the perfect quick fix for mid-day slumps, pre-workout boosts, or busy mornings on the go. What makes them truly special is how effortlessly all the wholesome ingredients come together, creating a deliciously satisfying snack that you can feel good about eating anytime.
Ingredients You’ll Need
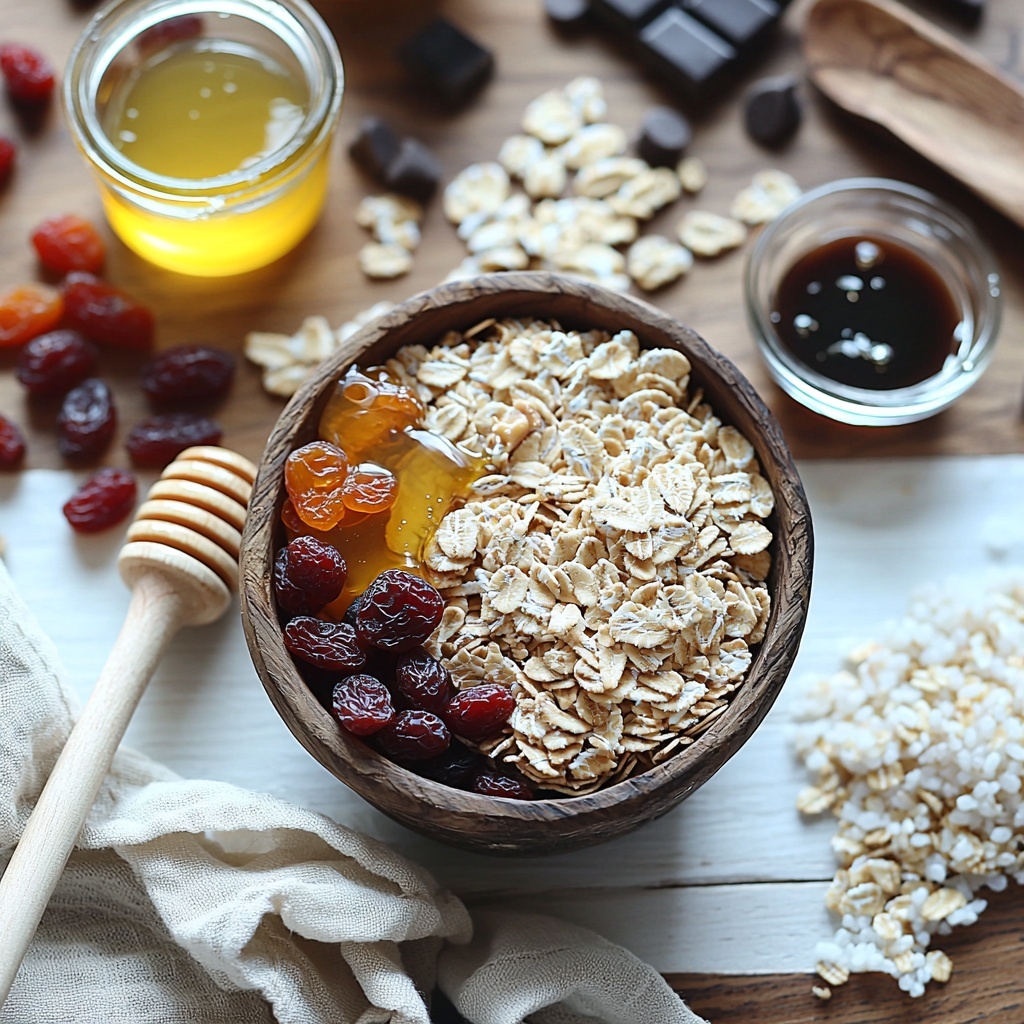
These ingredients are simple pantry staples but play crucial roles in transforming ordinary oats and nuts into irresistibly tasty energy bars. Each one adds texture, flavor, or natural sweetness to make these bars a delightful treat without any complicated steps.
- 2 cups rolled oats: The chewy, heart-healthy base that holds everything together and adds great texture.
- 1 cup puffed rice cereal (optional): Adds an extra light crunch that contrasts beautifully with the softness of the oats.
- 1/2 cup honey or maple syrup: Nature’s sweetener that binds and flavors the bars with a gentle, sticky sweetness.
- 1/4 cup peanut butter (or almond butter): A creamy, nutty binder that also enriches the flavor and adds healthy fats.
- 1/4 cup melted coconut oil or butter: Helps everything stick together smoothly and adds subtle richness.
- 1/4 cup dried fruit (raisins, cranberries, or apricots): Bursts of chewy, fruity sweetness scattered throughout each bite.
- 1/4 cup chopped nuts (almonds, walnuts, or pecans): Adds crunch, protein, and a toasty depth of flavor.
- 1/4 tsp vanilla extract (optional): A little detail that lifts all the other flavors and makes every bite taste buttery and aromatic.
- 1/4 tsp salt: Essential for balancing the sweetness and enhancing the overall taste.
- 1/4 cup chocolate chips (optional): A charming addition for an extra touch of indulgence without overpowering the wholesome vibes.
How to Make Homemade No-Bake Oat and Nut Energy Bars Recipe
Step 1: Preheat & Prepare Your Pan
Even though this is a no-bake recipe by name, we do a quick bake in the oven to add a toasty crisp to the bars. Preheat your oven to 350°F (175°C) and line an 8×8 inch baking pan with parchment paper or lightly grease it so your bars won’t stick when sliced.
Step 2: Mix Dry Ingredients
In a large bowl, gather and combine your rolled oats, puffed rice cereal if you’re using it, dried fruit, chopped nuts, salt, and the optional chocolate chips. This blend of dry ingredients forms the structural backbone of your bars, ensuring every bite offers a lovely balance of chewy and crunchy.
Step 3: Heat Wet Ingredients
In a small saucepan over medium-low heat, combine the honey or maple syrup with peanut butter and melted coconut oil or butter. Stir gently until everything melts and blends into a smooth, golden liquid. Take the pan off the heat and stir in the vanilla extract if you’d like a warm, fragrant undertone.
Step 4: Combine Wet and Dry Mixtures
Pour the warm, sticky mixture over the dry ingredients in your big bowl. Stir thoroughly until every oat, nut, and puffed rice gets coated with that luscious binding liquid. This step ensures your energy bars hold together beautifully while staying moist and flavorful.
Step 5: Press the Mixture into the Pan and Bake
Transfer the mixture into your prepared pan and press it down firmly with a spoon or spatula. Try to compact it evenly so the bars hold their shape and bake uniformly. Pop it in the oven for 15 to 18 minutes, or until the edges turn a gorgeous golden brown, indicating a perfect crispiness.
Step 6: Cool and Cut
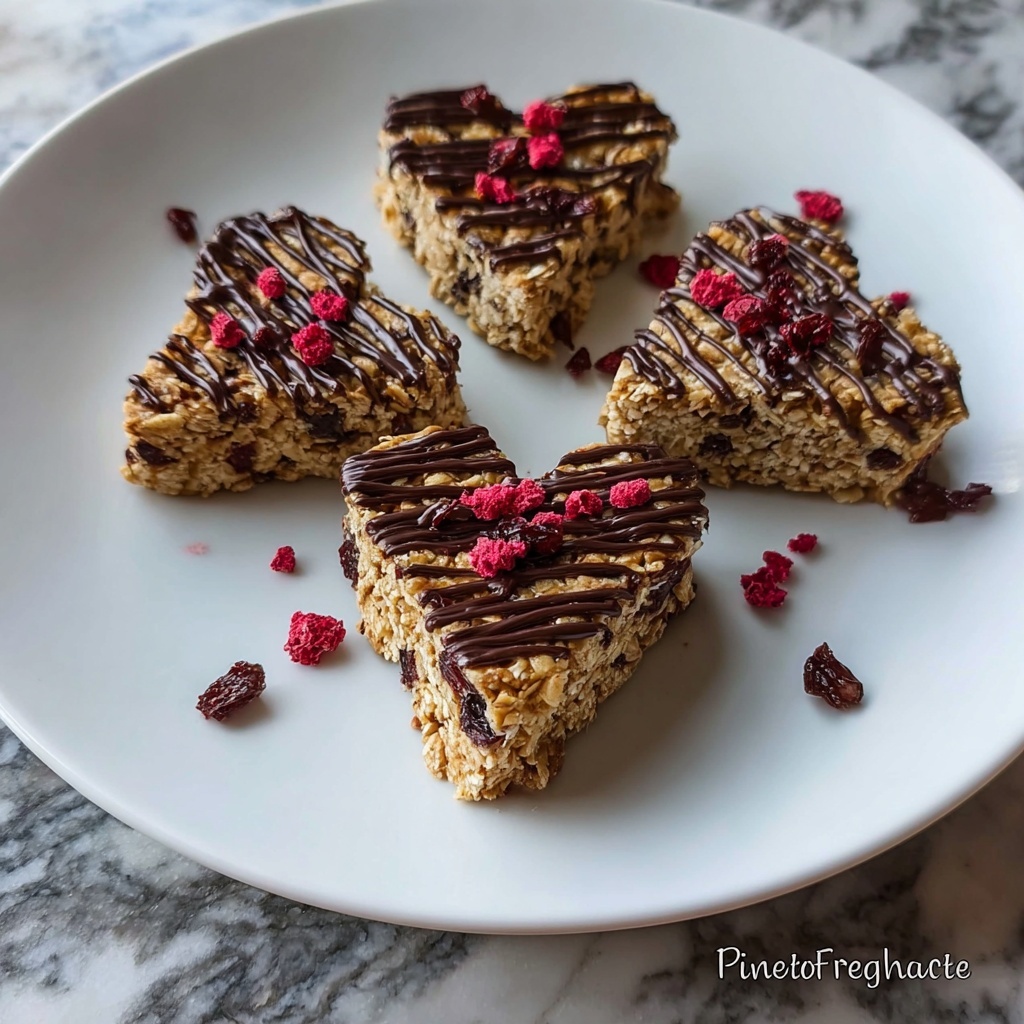
Patience here really pays off—let the bars cool completely in the pan. This step is crucial so they firm up and don’t crumble when sliced. For a fun twist, use a cookie cutter to make heart-shaped bars, or simply cut squares for a classic bar look.
How to Serve Homemade No-Bake Oat and Nut Energy Bars Recipe
Garnishes
A sprinkle of toasted coconut, a drizzle of melted dark chocolate, or even a dusting of cinnamon can take your energy bars to the next level. These garnish options add a little flair and extra flavor, especially if you’re serving them as a thoughtful snack for guests.
Side Dishes
These bars are perfectly portable and satisfying on their own, but they also pair wonderfully with a cup of herbal tea or a glass of cold almond milk. If you want something more filling, enjoy them alongside fresh fruit or a dollop of Greek yogurt to balance the energy boost with a refreshing twist.
Creative Ways to Present
Present your bars as a homemade gift by wrapping them individually in parchment paper tied with a rustic twine. Or assemble a colorful snack box with a variety of nuts, dried fruits, and these bars stacked neatly. They also make a charming addition to a breakfast spread or picnic basket!
Make Ahead and Storage
Storing Leftovers
Once your bars are cut and cooled, store them in an airtight container at room temperature. They keep their perfect chewy-crunchy texture for up to one week, making them an ideal make-ahead snack for busy days.
Freezing
To extend their shelf life, you can freeze the bars. Wrap them tightly in plastic wrap or foil, then place them in a freezer-safe container or bag. They freeze well for up to three months. When ready to enjoy, simply thaw at room temperature—still delicious and ready to fuel your day.
Reheating
While these bars are best enjoyed at room temperature or chilled, if you prefer them warm, pop them in the microwave for about 10 seconds. That gentle heat softens the chocolate chips and wakes up the nutty flavors without melting everything into a mess.
FAQs
Can I substitute peanut butter with another nut butter?
Absolutely! Almond butter, cashew butter, or sunflower seed butter work beautifully and will subtly change the flavor while keeping that creamy texture you need to bind the bars.
Is it necessary to bake the bars if the recipe says no-bake?
The “no-bake” in the name refers to how simple the preparation is compared to many bar recipes. The quick bake step gives the bars a delightful crisp edge and helps them hold together more firmly, but if you prefer, you can skip baking and just refrigerate them until firm.
Can I make these bars vegan?
Yes! Use maple syrup instead of honey and make sure your chocolate chips are dairy-free. Using coconut oil instead of butter also keeps it fully plant-based while adding richness.
How can I make the bars crunchier?
Adding the puffed rice cereal is key for extra crunch. Also, baking for the full 18 minutes or a few minutes longer, while watching closely, will give the bars a crispier texture without burning them.
Are these bars gluten-free?
They can be! Just make sure to use certified gluten-free oats and puffed rice cereal. The rest of the ingredients are naturally gluten-free, making this recipe a great option for gluten-sensitive eaters.
Final Thoughts
I hope this Homemade No-Bake Oat and Nut Energy Bars Recipe inspires you to whip up a batch soon. It’s an effortless, delicious way to stay energized and satisfy those snack cravings with wholesome ingredients. Trust me, once you taste these bars, they’ll become your go-to treat for busy days, workouts, or anytime you need a little natural energy boost!
“`
Print
Homemade No-Bake Oat and Nut Energy Bars Recipe
- Prep Time: 10 minutes
- Cook Time: 15-18 minutes
- Total Time: 25-28 minutes
- Yield: 12 bars
- Category: Snack
- Method: Baking
- Cuisine: American
- Diet: Vegetarian
Description
These homemade granola bars are a delicious and nutritious snack made from rolled oats, puffed rice cereal, nut butter, honey, and mixed dried fruits and nuts. Baked to golden perfection, they offer a satisfying crunch and can be customized with chocolate chips for extra sweetness. Perfect for a quick breakfast or an on-the-go energy boost.
Ingredients
Dry Ingredients
- 2 cups rolled oats
- 1 cup puffed rice cereal (optional, for extra crunch)
- 1/4 cup dried fruit (raisins, cranberries, or apricots)
- 1/4 cup chopped nuts (almonds, walnuts, or pecans)
- 1/4 tsp salt
- 1/4 cup chocolate chips (optional, for extra sweetness)
Wet Ingredients
- 1/2 cup honey or maple syrup
- 1/4 cup peanut butter (or almond butter)
- 1/4 cup melted coconut oil or butter
- 1/4 tsp vanilla extract (optional)
Instructions
- Preheat & Prepare Pan: Preheat your oven to 350°F (175°C). Line an 8×8 inch baking pan with parchment paper or lightly grease it to prevent sticking.
- Mix Dry Ingredients: In a large bowl, combine the rolled oats, puffed rice cereal if using, dried fruit, chopped nuts, salt, and optional chocolate chips. Stir well to evenly distribute all ingredients.
- Heat Wet Ingredients: In a small saucepan over medium-low heat, combine the honey or maple syrup, peanut butter, and melted coconut oil or butter. Stir constantly until the mixture is smooth and well blended. Remove from heat and stir in the vanilla extract if using.
- Combine Wet and Dry Ingredients: Pour the warm wet mixture over the dry ingredients. Stir thoroughly until all dry ingredients are coated evenly with the wet mixture.
- Press & Bake: Transfer the combined mixture into the prepared pan. Using a spoon or spatula, firmly press the mixture down to create a compact and even layer. Bake in the preheated oven for 15-18 minutes or until the edges turn golden brown and become slightly crispy.
- Cool & Cut: Remove the baked granola bars from the oven and allow them to cool completely in the pan. Once cooled, cut them into heart-shaped pieces using a cookie cutter or into squares for simpler shapes.
Notes
- For extra crunch, bake the bars a bit longer while closely watching the edges to avoid burning.
- Store the granola bars in an airtight container at room temperature for up to one week.
- Refrigerate for longer shelf life if needed.
