“`html
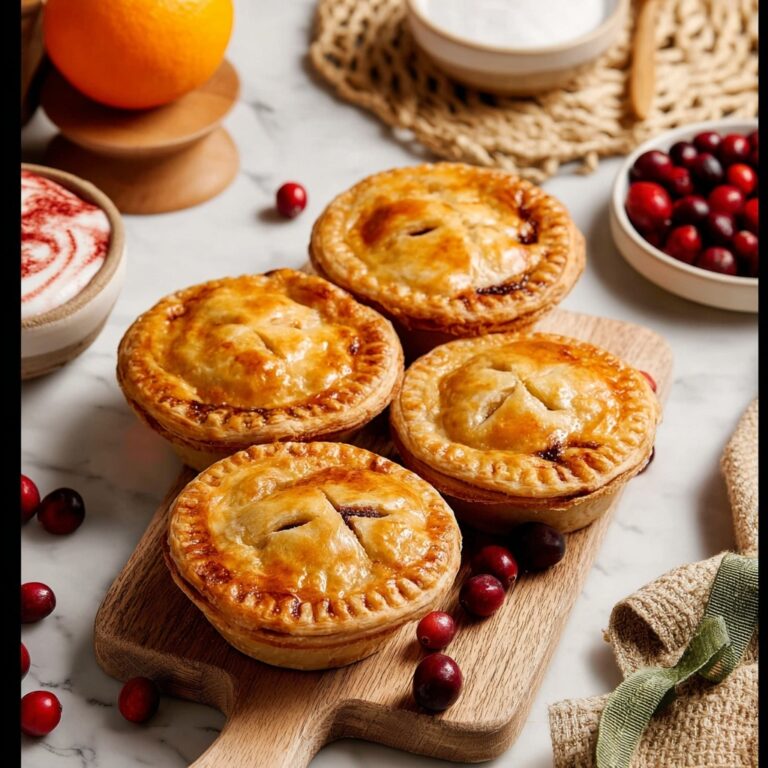
If you have ever dreamed of a nostalgic breakfast treat made effortlessly from scratch, then these Easy Homemade Pop Tarts with Pie Crust Recipe are about to become your new favorite indulgence. Flaky, golden pie crust pockets bursting with luscious jam and finished with a sweet glaze bring a perfect blend of comfort and creativity to your mornings or anytime snack cravings. Trust me, once you try making these at home, you won’t want to settle for the store-bought kind ever again.
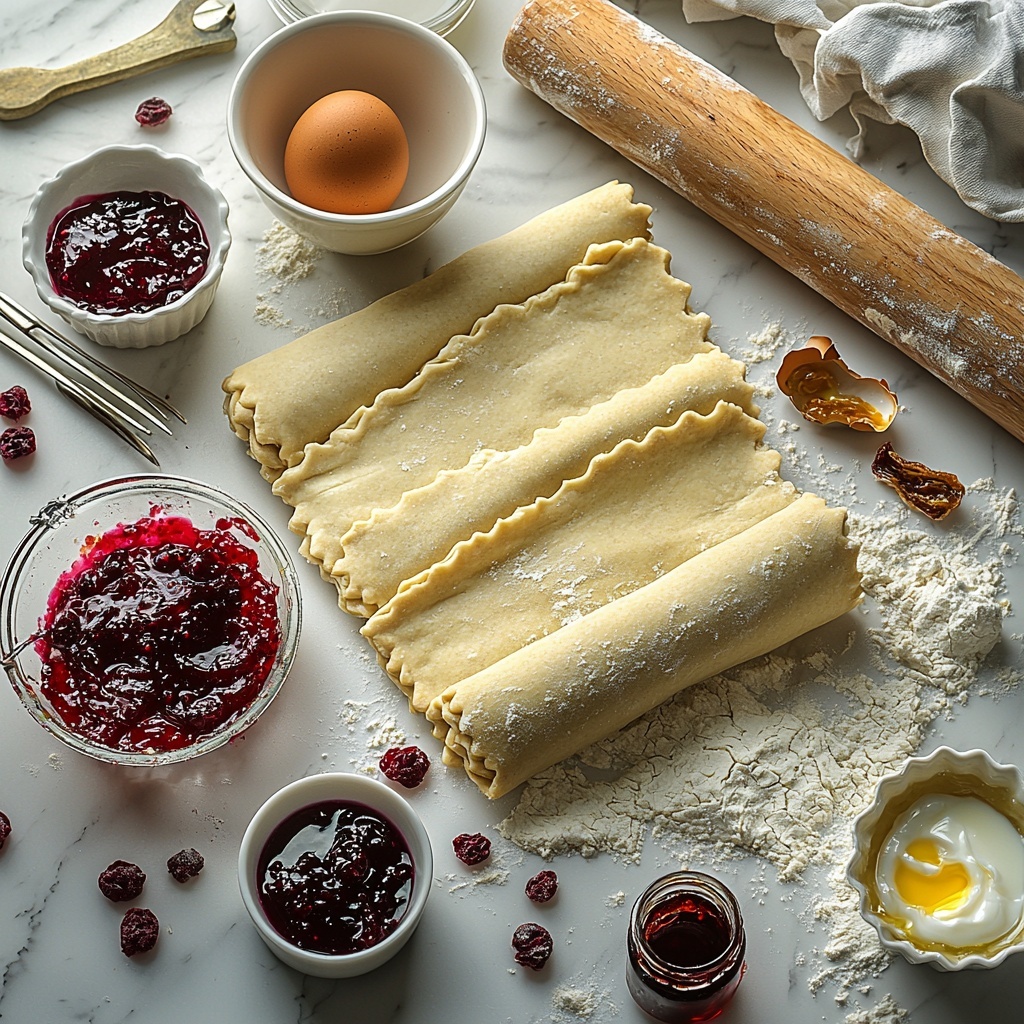
Ingredients You’ll Need
The charm of this recipe lies in its simplicity and the pantry-friendly ingredients that come together beautifully to create a flaky, jam-filled delight. Each component plays an essential role: the pie crust offers that buttery, tender base, the jam delivers vibrant fruity sweetness, and the glaze ties everything together with a creamy finish.
- 1 package rolled pie crust (2 ct., 7.5 oz pack): The foundation for your pop tarts, providing a perfectly flaky and buttery texture without any fuss.
- 1 cup plus 2 tablespoons jam or preserves: Your flavorful filling—choose your favorite fruit jam to add a burst of sweetness and color.
- 1 large egg: Used as an egg wash to give your pop tarts a beautiful golden sheen and help seal the edges.
- 1 cup powdered sugar: The base for the glaze to add a smooth, sweet finish on top of the baked tarts.
- 2-3 tablespoons milk or cream: Mixed into the powdered sugar for the perfect glaze consistency with a creamy richness.
- 2 tablespoons jam: Added to the glaze for an extra pop of fruity flavor and lovely color swirls.
- 1/2 teaspoon vanilla: Enhances the glaze with warm, sweet undertones, making the pop tarts taste even more irresistible.
How to Make Easy Homemade Pop Tarts with Pie Crust Recipe
Step 1: Prepare Your Workspace and Crust
Start by preheating your oven to 400°F, so it’s ready once your pop tarts are assembled. Lay a sheet of parchment paper on a baking sheet to prevent sticking. Unroll one sheet of pie crust onto another piece of parchment and carefully cut as many rectangles as you can measuring about 3 inches by 5 inches—an index card works perfectly as a guide! Gather the leftover crust scraps, roll them out gently just under 1/4 inch thick, and cut more rectangles. This ensures you maximize every bit of crust for your pop tarts.
Step 2: Fill and Seal Your Pop Tarts
Crack your egg into a small bowl and beat it well to create an egg wash. Place 8 rectangles neatly spaced on your prepared baking sheet. Spoon about 1 1/2 tablespoons of your chosen jam onto each rectangle, making sure to keep it away from the edges to avoid leakage. Lightly brush the edges with egg wash, then carefully top each jam-filled piece with another rectangle. Press the edges together and crimp firmly with a fork to seal in that fruity treasure. Poke a few tiny holes in the top crust to allow steam to escape during baking, then brush the entire top surface, edges included, with more egg wash for a gorgeous golden finish.
Step 3: Bake Until Golden and Flaky
Pop your baking sheet into the oven and bake for 12 to 15 minutes. You’ll know they’re done when the crust turns beautifully golden and flaky. The aroma alone will have you eager to taste one right out of the oven, but hold on to the exciting final touch.
Step 4: Whisk and Glaze
Once your pop tarts have cooled slightly, it’s time to make the glaze. Whisk together the powdered sugar, milk or cream, vanilla, and 2 tablespoons of jam until smooth and spreadable. Generously spread this luscious icing over each pop tart. For fun and flair, top with sprinkles, crushed freeze-dried berries, or even edible rose petals for a special touch. These finishing touches not only add visual appeal but enhance flavor and texture with every bite.
How to Serve Easy Homemade Pop Tarts with Pie Crust Recipe
Garnishes
Feel free to get playful with your garnishes! Fresh berries, a dusting of cinnamon, or a sprinkle of powdered sugar can add extra flavor and a festive look. If you want to go the extra mile, colorful sprinkles or crushed freeze-dried fruit elevate the pops of color and texture, making each pop tart feel like a little celebration on your plate.
Side Dishes
Pair these pop tarts with a warm cup of coffee or tea for a cozy breakfast experience. They also sparkle alongside fresh fruit salad or a dollop of vanilla yogurt, creating a balanced breakfast that feels indulgent and nourishing at once.
Creative Ways to Present
Arrange your pop tarts on a rustic wooden board or a delicate cake stand for brunch. You can even cut them into bite-sized squares as a fun finger food at gatherings. Wrap a few in parchment paper tied with twine for a charming grab-and-go treat that friends and family will adore.
Make Ahead and Storage
Storing Leftovers
If you manage to save leftovers, store them in an airtight container at room temperature for up to 2 days. Since these pop tarts are best fresh, try to enjoy them quickly to savor the flaky texture and fresh jam flavors at their peak.
Freezing
Want to make these ahead of time? You can freeze unbaked pop tarts on a parchment-lined sheet, then transfer them to a freezer-safe bag once solid. Bake from frozen, adding a few extra minutes of cook time, or freeze baked and glazed pop tarts for quick treats later. Just remember to freeze them tightly wrapped to maintain freshness and flavor.
Reheating
To warm up your pop tarts, place them in a toaster oven or conventional oven at 300°F for about 5 to 7 minutes, just until heated through and the crust regains its crispness. Avoid microwaving, which can make the crust soggy and detracts from that flaky perfection.
FAQs
Can I use homemade pie crust instead of store-bought?
Absolutely! Homemade pie crust works wonderfully and can add an extra personal touch. Just roll it out to about 1/4 inch thick and proceed with cutting your rectangles as directed.
What types of jam are best for these pop tarts?
Any jam or preserves you love will work. Classic strawberry, raspberry, blueberry, or apricot are all delicious options. For a fun twist, try marmalade or even a nut butter and fruit spread combo.
How do I prevent the pop tarts from leaking jam?
Be sure not to overfill your pastry rectangles and leave at least a 1/4 inch border around the edges. Brushing the edges with egg wash before sealing helps create a tight seal that keeps the jam inside while baking.
Can I make these gluten-free?
Yes, if you use a gluten-free rolled pie crust, you can enjoy this recipe gluten-free. Just be mindful of your jam and other ingredients if you have strict dietary needs.
Why is it important to poke holes in the top crust?
Poking holes allows steam to escape as the pop tarts bake, preventing them from puffing up too much or bursting. It also helps the pastry cook evenly for that perfect flaky texture.
Final Thoughts
Making Easy Homemade Pop Tarts with Pie Crust Recipe is such a joyful experience that brings warmth and sweetness to any day. Whether it’s a weekend breakfast project or a special treat for your loved ones, these pop tarts offer a comforting, delicious reminder that sometimes simple ingredients and a bit of love create the most memorable dishes. Give them a try and watch your kitchen fill with irresistible aromas and smiles!
“`
Print
Easy Homemade Pop Tarts with Pie Crust Recipe
- Prep Time: 15 minutes
- Cook Time: 15 minutes
- Total Time: 30 minutes
- Yield: 6 servings (approximately 12 pop tarts)
- Category: Breakfast
- Method: Baking
- Cuisine: American
- Diet: Vegetarian
Description
These Easy Homemade Pop Tarts with Pie Crust are a delightful and simple treat made from rolled pie crust and your favorite jam. They are quick to prepare and bake, making them perfect for a homemade breakfast or snack. Topped with a sweet glaze, these pop tarts offer a flaky, buttery crust filled with fruity goodness and a charming homemade touch.
Ingredients
Pop Tarts
- 1 package rolled pie crust (2 count, 7.5 oz each)
- 1 cup plus 2 tablespoons jam or preserves (your choice of flavor)
- 1 large egg (for egg wash)
Icing
- 1 cup powdered sugar
- 2–3 tablespoons milk or cream
- 2 tablespoons jam
- 1/2 teaspoon vanilla extract
Instructions
- Preheat the Oven. Set your oven to 400°F to ensure it reaches the perfect baking temperature while you prepare your pop tarts.
- Prepare the Pie Crust. Lay a sheet of parchment paper on a baking sheet and unroll the pie crust onto another sheet of parchment. Cut as many approximately 3-inch by 5-inch rectangles as possible from the crust. Knead and roll out any remaining dough to cut additional rectangles until all dough is used.
- Assemble the Pop Tarts. Beat the egg in a small bowl to create the egg wash. Place 8 rectangles on the lined baking sheet and spoon about 1 1/2 tablespoons of jam onto each. Brush the edges of each rectangle with egg wash, then cover with another rectangle. Pinch and crimp the edges together with a fork to seal, poke holes in the tops to allow steam to escape, and brush the entire top with egg wash.
- Bake the Pop Tarts. Bake them for 12 to 15 minutes or until they turn golden brown, ensuring a crispy and flaky texture.
- Prepare the Icing. Once the pop tarts have cooled, whisk together the powdered sugar, milk or cream, jam, and vanilla extract until smooth and spreadable.
- Decorate and Serve. Spread the icing generously over each pop tart and optionally top with sprinkles, crushed freeze-dried berries, or edible rose petals. Store in an airtight container and enjoy fresh for the best taste.
Notes
- Use any flavor of jam or preserves to customize your pop tarts to your taste.
- For a thinner crust, roll out the dough carefully and evenly to about 1/4 inch thickness or less.
- Freezing the pop tarts before baking can help maintain their shape but is optional.
- If you don’t have powdered sugar, you can make a simple glaze with granulated sugar dissolved in milk, though the texture will differ.
- Consume fresh for the best flavor as they are best eaten within two days when stored in an airtight container.