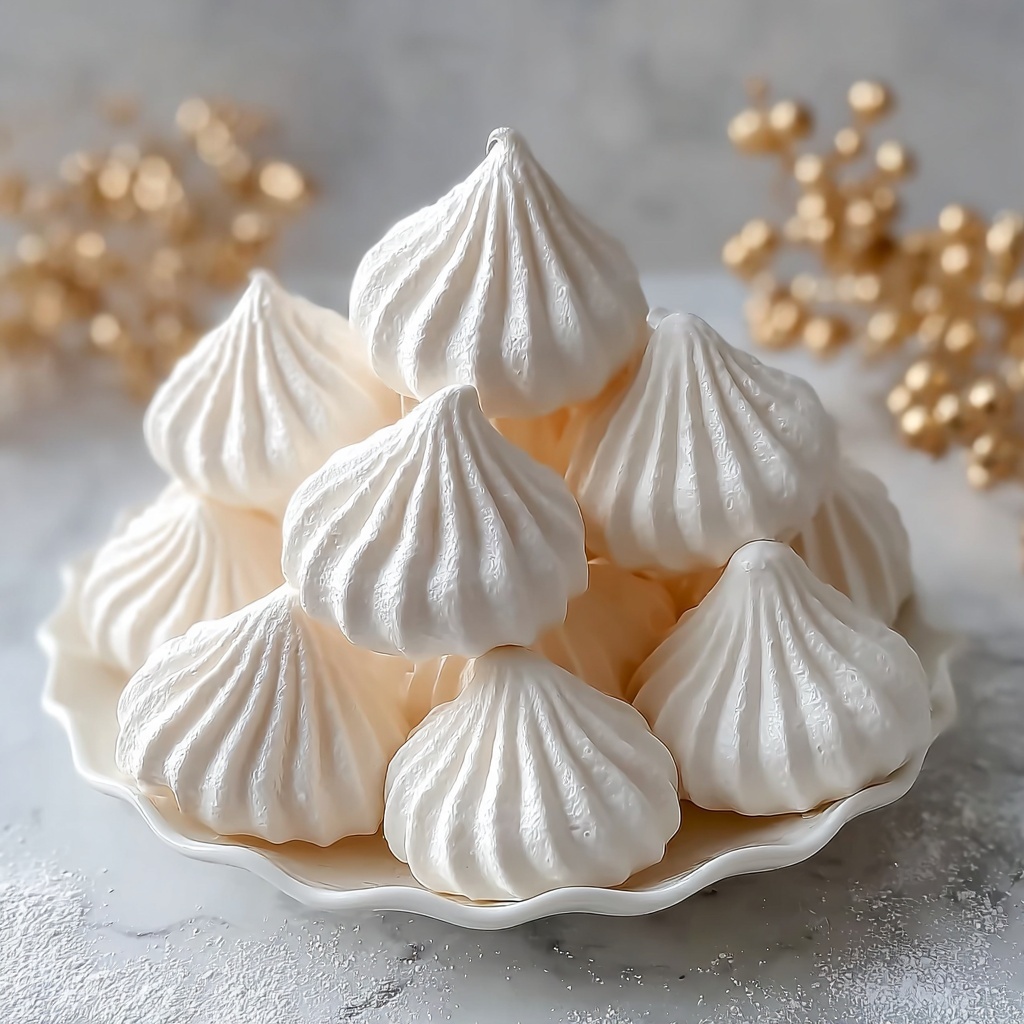
If you have a sweet tooth but crave something light, airy, and utterly satisfying, you are going to fall head over heels for this recipe. Crispy Meringue Cookies – A Light, Sweet, and Perfectly Crispy Treat Recipe combines the magic of whipped egg whites and sugar into delicate little clouds of flavor that simply melt on your tongue. These cookies aren’t just beautiful—they are the perfect balance of crisp and sweet, making them a delightful snack or an impressive dessert to share with friends and family. Trust me, once you try these, they will quickly become one of your favorite homemade treats to whip up again and again.
Ingredients You’ll Need
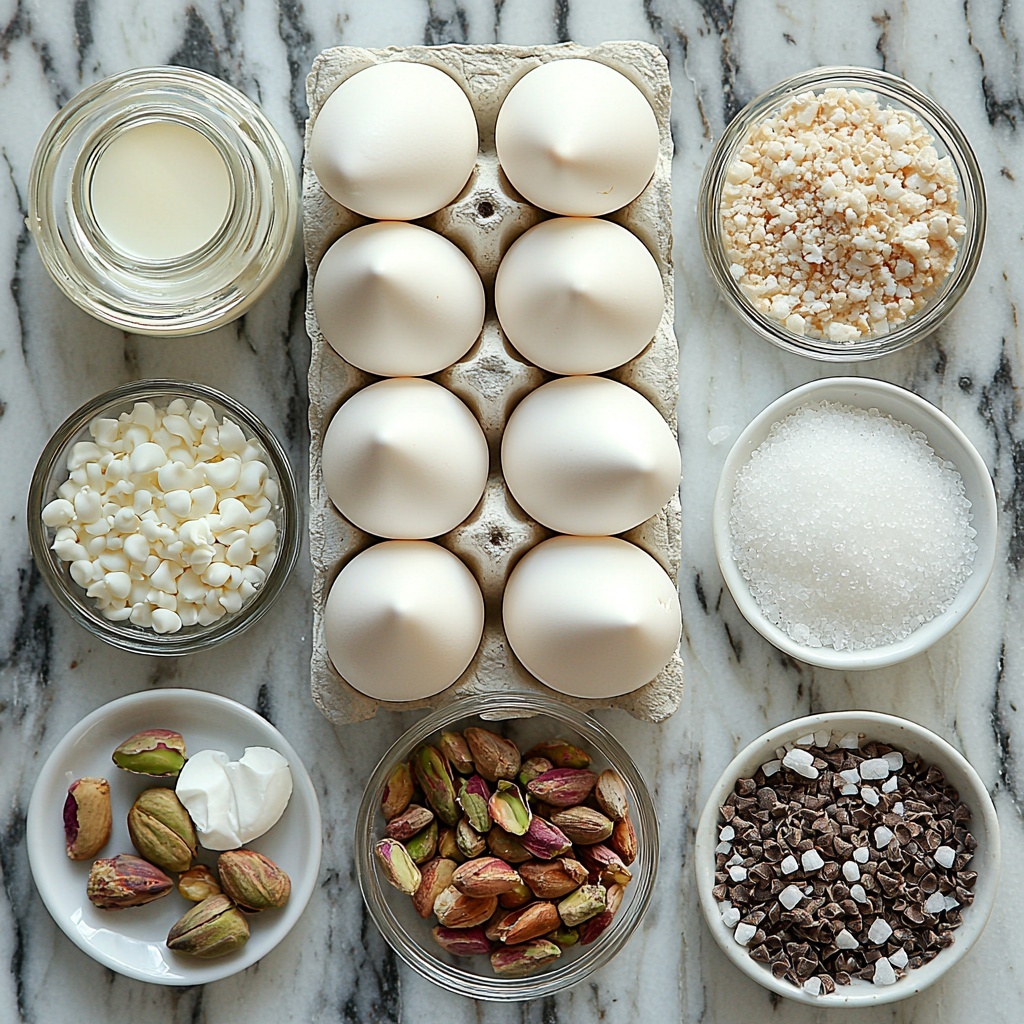
This recipe is wonderfully straightforward, relying on a small handful of kitchen staples that come together to create pure magic. Each ingredient plays an essential role, whether it’s the silky texture from the egg whites or the glossy shine from the sugar.
- 4 large egg whites (at room temperature): Fresh egg whites provide the light and airy base that’s vital for meringue’s texture.
- 1 cup granulated sugar: Gives sweetness while helping to stabilize and crisp the meringue perfectly.
- 1 teaspoon vanilla extract (or alternative flavoring): Adds aromatic depth—you can also experiment with almond or lemon extracts for a fun twist.
- 1/4 teaspoon cream of tartar (optional): This helps stabilize the egg whites, making them firmer and less wobbly when whipped.
- Pinch of salt: Balances the sweetness and enhances overall flavor.
- Optional garnishes: Mini chocolate chips, crushed nuts like pistachios or almonds, or colorful sprinkles bring both texture and personality to your meringues.
How to Make Crispy Meringue Cookies – A Light, Sweet, and Perfectly Crispy Treat Recipe
Step 1: Preheat and Prepare
Start by setting your oven to a low 200°F (90°C). Lining your baking sheet with parchment paper or a silicone mat ensures the meringues release easily once baked. This low temperature is key to drying out the cookies gently without browning them, preserving that pristine white and crisp exterior that makes these treats so special.
Step 2: Whip Those Egg Whites to Perfection
Using a clean and completely dry bowl, beat your egg whites on medium speed until they become foamy. This is your meringue’s foundation, so don’t rush this step! Adding the cream of tartar here will help stabilize the foam and give you those glossy waves of whipped egg white magic. Then, crank up the speed to high and whip until soft peaks form—soft enough to hold shape but still tender.
Step 3: Add Sugar Slowly and Beat to Stiff Peaks
Patience is your best friend here. Gradually add the sugar one tablespoon at a time while continuing to whip. This slow incorporation allows the sugar to dissolve fully and gives you a stunning glossy meringue that holds stiff peaks when you lift the beaters. The texture here is crucial—it should feel smooth between your fingers and look shiny like a polished pearl.
Step 4: Flavor and Fold
Next up, gently fold in your vanilla extract or alternative flavoring along with a tiny pinch of salt. These little additions deepen the taste and make each bite even more irresistible. The meringue remains dreamy and spectacularly shiny after this step, just wait until you see how it bakes!
Step 5: Shape and Space the Meringue
Time to get creative! You can pipe the meringue using a piping bag fitted with your favorite tip to create pretty rosettes or simply spoon small dollops onto your prepared sheet. Be sure to leave about an inch of space between each cookie because while they don’t spread much, they need room to crisp evenly all around without sticking together.
Step 6: The Slow Bake
Bake the meringue cookies for about 1 to 1.5 hours. The goal is to dry them out completely without browning their delicate surfaces. They should feel dry and lift off the parchment without any hassle. That crisp exterior with an almost melt-in-your-mouth interior is why these cookies are so beloved!
Step 7: Cool Down Gently
After turning off the oven, keep the cookies inside with the door slightly ajar for another 30 minutes to an hour. This slow cooling step helps prevent cracking and ensures they set just right. Once they’re completely cool, transfer them to an airtight container to keep their crisp charm intact.
How to Serve Crispy Meringue Cookies – A Light, Sweet, and Perfectly Crispy Treat Recipe
Garnishes
Topping your meringue cookies with mini chocolate chips or a sprinkle of crushed pistachios adds a wonderful textural contrast and an extra layer of flavor. I love how the green nuts pop against the snowy white meringue, giving both visual appeal and a nutty crunch that surprises the palate.
Side Dishes
These cookies pair wonderfully with piping hot coffee or a frothy cappuccino, the perfect balance of sweet and bitter. They also make an excellent companion to fresh fruit like berries, or a dollop of lightly sweetened whipped cream to amp up the indulgence without overwhelming the delicate texture.
Creative Ways to Present
Want your Crispy Meringue Cookies – A Light, Sweet, and Perfectly Crispy Treat Recipe to really impress? Arrange them on a tiered stand for a charming party dessert, or use them as whimsical toppers for cakes and puddings. Layering them inside parfaits with creamy yogurt or mousse adds that delightful crunch that makes dessert unforgettable.
Make Ahead and Storage
Storing Leftovers
Because meringue cookies are naturally dry and crisp, they store beautifully in an airtight container at room temperature. Just keep them in a cool, dry place away from humidity to preserve their texture. They can last up to two weeks if stored correctly, making them perfect for prepping ahead of time for gatherings.
Freezing
Yes, you can freeze these delightful treats! Place them in a tight-sealing freezer bag with parchment sheets between layers to prevent sticking. When you’re ready to enjoy, take them out and allow them to thaw at room temperature for about 30 minutes—crispy and delicious, just like freshly baked.
Reheating
If you want to revive a slightly softened cookie, pop them into a low oven (around 200°F or 90°C) for 5 to 10 minutes. This gentle heat helps restore that signature crisp without risking melting or browning.
FAQs
Why are my meringue cookies sticky?
Sticky meringues often mean that the sugar didn’t fully dissolve during whipping or that humidity in the environment is high. Make sure to add sugar gradually and whip until stiff peaks form, and try baking on a dry day for the best results.
Can I use powdered sugar instead of granulated sugar?
Powdered sugar contains cornstarch which can affect the texture of meringues, making them less crisp. Granulated sugar is preferred for that classic crisp and airy texture.
What does cream of tartar do in this recipe?
Cream of tartar stabilizes the egg whites, helping maintain their structure and preventing them from collapsing during whipping and baking. It’s optional but recommended for the best rise and sturdiness.
Can I add food coloring to the meringue?
Absolutely! Gently fold in a few drops of gel-based food coloring after whipping the egg whites to stiff peaks for a fun pop of color without affecting texture.
How long do these meringue cookies stay fresh?
Stored properly in an airtight container, they stay crispy and fresh for up to two weeks. Just be sure to keep them away from moisture, which can soften their delicate crunch.
Final Thoughts
There’s something truly magical about mastering Crispy Meringue Cookies – A Light, Sweet, and Perfectly Crispy Treat Recipe. These airy clouds of sweetness bring joy to both the making and the eating. I encourage you to try this recipe yourself—it’s simple, rewarding, and such a wonderful way to delight your senses and your loved ones. Once you get the hang of it, you’ll find these cookies are one of those timeless treats you’ll want to make again and share endlessly.
Print
Crispy Meringue Cookies – A Light, Sweet, and Perfectly Crispy Treat Recipe
- Prep Time: 10 minutes
- Cook Time: 1 to 1.5 hours
- Total Time: 1 hour 15 minutes
- Yield: 24–30 cookies
- Category: Dessert
- Method: Baking
- Cuisine: French
- Diet: Gluten Free
Description
These Crispy Meringue Cookies are light, airy, and delicately sweet, made from whipped egg whites and sugar. They boast a melt-in-your-mouth texture and an elegant appearance, perfect for parties, gifts, or a delightful personal treat. Simple to prepare but impressive in taste and look, these classic French desserts offer a perfectly crispy and sweet experience.
Ingredients
For the Cookies:
- 4 large egg whites (at room temperature)
- 1 cup granulated sugar
- 1 teaspoon vanilla extract (or other flavoring, such as almond or lemon)
- 1/4 teaspoon cream of tartar (optional, helps stabilize the meringue)
- Pinch of salt
- Optional for garnish: Mini chocolate chips, Crushed nuts (like pistachios or almonds), Colored sprinkles
Instructions
- Preheat the Oven: Preheat your oven to 200°F (90°C) and line a baking sheet with parchment paper or a silicone baking mat to prepare for baking the meringues.
- Whip the Egg Whites: In a clean, dry mixing bowl, beat the egg whites with an electric mixer on medium speed until they become foamy. Add cream of tartar if using, then beat on high speed until soft peaks form, which helps provide stability.
- Add the Sugar: Gradually add the granulated sugar one tablespoon at a time while continuing to beat the mixture until stiff, glossy peaks form, indicating the meringue is properly aerated and stable.
- Add Flavoring: Mix in the vanilla extract (or any preferred flavoring) and a pinch of salt, ensuring the meringue remains smooth, shiny, and well-incorporated.
- Pipe or Spoon the Meringue: Transfer the meringue to a piping bag or spoon it onto the prepared baking sheet, shaping into small dollops or decorative rosettes, spaced about 1 inch apart to allow for even baking.
- Bake: Bake the cookies in the preheated oven for 1 to 1.5 hours until they are dry to the touch and easily lift from the parchment paper. The cookies should remain white without browning.
- Cool and Serve: Turn off the oven, leave the door slightly ajar, and let the meringue cookies cool inside for 30 minutes to an hour. Once completely cool, store them in an airtight container to maintain crispness.
Notes
- Ensure the mixing bowl and beaters are completely clean and free from any grease to achieve proper egg white volume.
- Use room temperature egg whites for optimal whipping consistency.
- The cream of tartar is optional but helps stabilize the egg whites and improve texture.
- Do not brown the meringues; baking at a low temperature ensures they dry out without color change.
- Store the cooled meringue cookies in an airtight container to keep them crisp and prevent moisture absorption.
- You can add various garnishes like mini chocolate chips, crushed nuts, or colored sprinkles for added texture and presentation.


