
“`html
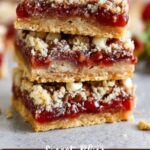
If you are looking for a dessert that feels like a warm hug on a plate, let me introduce you to the Strawberry Bliss Bars Recipe. These bars are an irresistible combination of buttery crust, luscious strawberry jam, and a delightful mix of milk and white chocolate chips, all topped with a crispy, coconut-oat crumble. With every bite, you get a perfect balance of textures and flavors that make this treat truly unforgettable—whether for a family gathering, a picnic, or a cozy afternoon snack.
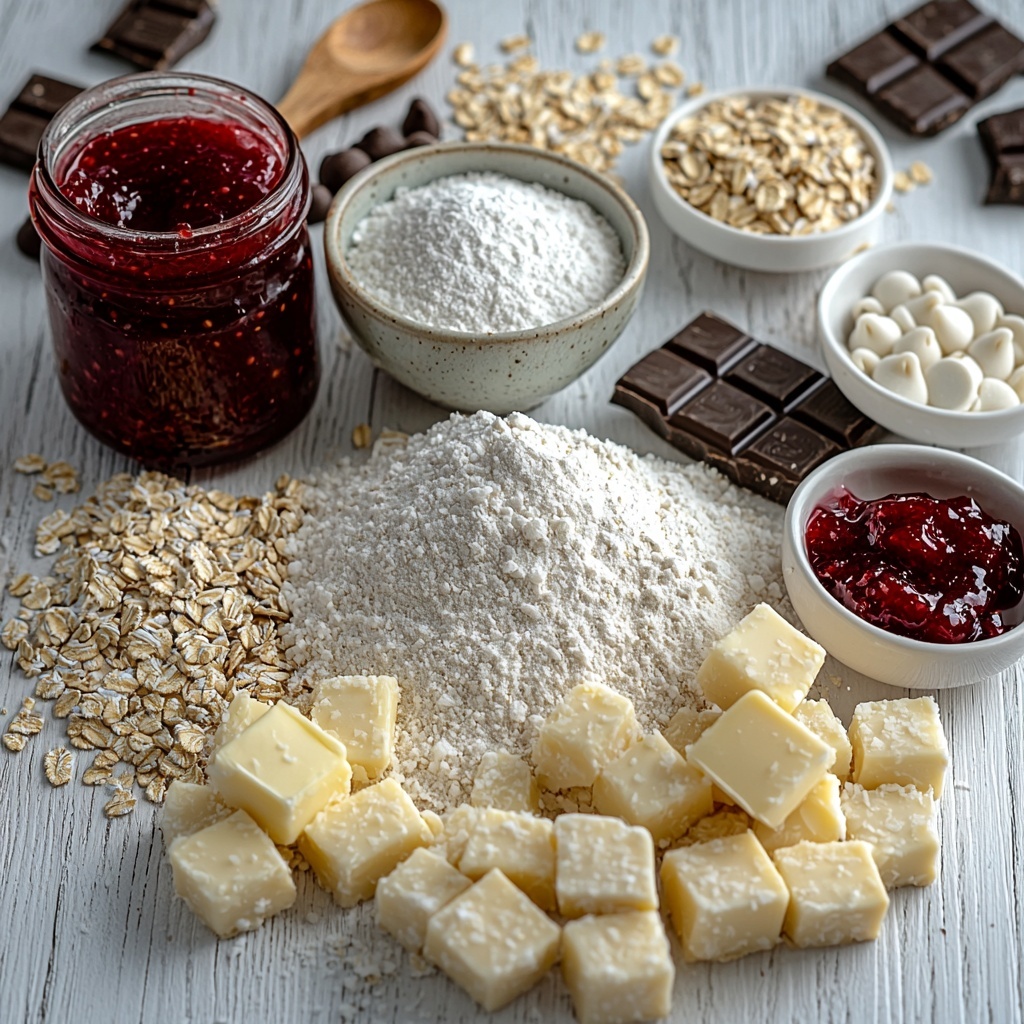
Ingredients You’ll Need
Gathering simple, pantry-friendly ingredients is the first step toward making these bars shine. Each item plays a crucial role, from the rich, buttery crust to the sweet strawberry jam that gives the bars their special zing and color, while oats and coconut add a perfect nutty crunch.
- 1 ¼ cups all-purpose flour: The base for the crust, giving structure and tenderness.
- 3/4 cup cold salted butter (cut into small pieces): Adds rich flavor and creates a flaky texture in the crust.
- 2/3 cup light brown sugar: Brings moisture and a subtle caramel note to the bars.
- 1/4 cup granulated sugar: Balances sweetness and aids in browning the crust.
- 1/4 teaspoon salt: Enhances all the flavors without overpowering.
- 1/4 teaspoon ground cinnamon: Adds a gentle warmth that complements the strawberry nicely.
- 3/4 cup sweetened shredded coconut: Offers a delightful chew and tropical flair.
- 1/2 cup old-fashioned oats: Gives texture and heartiness to the crumble topping and crust.
- 1 ¼ cups strawberry jam: The star ingredient, delivering bright, fruity sweetness and vibrant color.
- 3/4 cup milk chocolate chips: Melts beautifully and adds creamy, sweet chocolate flavor.
- 3/4 cup white chocolate chips: Adds contrast in both color and a smooth, mellow sweetness.
How to Make Strawberry Bliss Bars Recipe
Step 1: Prepare Your Oven and Pan
Start by preheating your oven to 350 degrees Fahrenheit. Then, line a 9×13-inch pan with parchment paper and lightly spray it with nonstick spray. This ensures your bars lift out cleanly and keep their perfect shape after baking. This little prep work makes cleanup easy too — always a win!
Step 2: Make the Crust Mixture
In a food processor, pulse together the flour, cold salted butter, both sugars, salt, and cinnamon until the mixture resembles coarse meal. This step is essential to create a tender, crumbly crust that will hold all those delicious layers. If you don’t have a food processor, no worries — a pastry blender or even two forks work just fine. The key is to keep the butter cold and cut into small pieces so it blends evenly.
Step 3: Add Coconut and Oats
Transfer your flour mixture to a large bowl and stir in the shredded coconut and old-fashioned oats. These ingredients add great texture and a subtle chewiness that contrast beautifully with the smooth jam and melty chocolates. Set aside ¾ cup of this flour-coconut-oats mixture for later, and press the rest firmly into the prepared pan, creating an even base for the bars.
Step 4: Bake the Crust
Bake the crust layer until it turns lightly golden, which usually takes around 15 to 18 minutes. This step gives the base stability and a slightly nutty flavor. Once baked, let it cool right in the pan on a wire rack for about 10 minutes. This brief cooling helps the jam to spread evenly without melting into the crust too much.
Step 5: Layer Jam and Chocolate Chips
Carefully spread the strawberry jam over the warm crust, coaxing it to spread smoothly without soaking in too deeply. Then, sprinkle the milk and white chocolate chips evenly on top. This mixture brings vibrant color and an indulgently creamy sweetness that’s irresistible as it melts gently during baking.
Step 6: Add the Crumble Topping and Final Bake
Sprinkle the reserved flour-coconut mixture evenly over the jam and chocolate layer. This creates a lovely, crisp topping that contrasts perfectly with the gooey middle. Pop the pan back into the oven and bake for about 18 to 22 minutes, until the top is a gorgeous golden brown.
Step 7: Cool and Slice
Remove the pan from the oven and allow the bars to cool completely, about 1 hour. Cooling fully ensures the bars set nicely and slice cleanly. Use the parchment paper to carefully lift the bars out, then cut into 24 squares and get ready to enjoy every blissful bite!
How to Serve Strawberry Bliss Bars Recipe
Garnishes
To give your Strawberry Bliss Bars that extra flair, consider topping each bar with a dollop of whipped cream or a sprinkle of powdered sugar. Fresh strawberry slices or a mint leaf make a refreshing, colorful garnish that brightens the presentation and enhances the strawberry flavor wonderfully.
Side Dishes
These bars stand beautifully on their own, but if you want to round out your dessert offering, pair them with a scoop of vanilla ice cream or a simple fresh fruit salad. The creamy vanilla mellows the rich chocolate and jam, while fruit salad adds a crisp, refreshing contrast.
Creative Ways to Present
For parties, consider cutting the bars into bite-sized squares and arranging them on a pretty platter with edible flowers or sanding sugar for sparkle. You can also layer small bars in clear jars for a charming, portable presentation that guests will love. These touches make serving the Strawberry Bliss Bars Recipe truly special.
Make Ahead and Storage
Storing Leftovers
Once baked and cooled, store any leftover bars in an airtight container at room temperature. They will stay fresh and delicious for 3 to 4 days, making them an excellent make-ahead treat you can enjoy through the week.
Freezing
If you want to keep your Strawberry Bliss Bars Recipe longer, wrap individual bars tightly in plastic wrap and place them in a freezer-safe container or bag. They freeze wonderfully for up to 2 months. Just thaw overnight in the fridge before serving to maintain their perfect texture.
Reheating
These bars are lovely served at room temperature, but if you prefer them a little warm, pop individual bars in the microwave for 10 to 15 seconds. This gently melts the chocolate chips inside, bringing back that freshly baked charm without drying the bars out.
FAQs
Can I use a different type of jam instead of strawberry?
Absolutely! While the strawberry jam is the heart of the Strawberry Bliss Bars Recipe, you can swap in raspberry, blackberry, or even apricot jam for a delicious twist that suits your taste.
Do I need to use both milk and white chocolate chips?
Using both milk and white chocolate chips creates a lovely balance of flavor and visual appeal. However, if you prefer, you can use one type of chocolate chip exclusively, or even dark chocolate for a richer taste.
Can I make these bars gluten-free?
You can modify this recipe using a gluten-free all-purpose flour blend that measures cup-for-cup like regular flour. Just ensure your oats are labeled gluten-free as well to keep everything safe for gluten-sensitive diets.
Is there a way to make the bars less sweet?
If you prefer a less sweet bar, try reducing the granulated or brown sugar slightly or use a less sweetened jam. Using dark chocolate chips instead of milk and white chocolate can also help balance sweetness.
What’s the best way to cut the bars without them crumbling?
Allow the bars to cool completely before slicing, and use a sharp knife warmed under hot water and dried off. This helps you get clean, neat cuts without the bars falling apart.
Final Thoughts
The Strawberry Bliss Bars Recipe is one of those desserts that feels like home, with its tender crust, bright jam, and melty chocolates all wrapped up in a crispy crumble. It’s perfect for sharing or keeping all to yourself! I can’t wait for you to try making these bars because once you do, they’re sure to become a beloved classic in your kitchen too.
“`
Print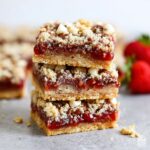
Strawberry Bliss Bars Recipe
- Prep Time: 15 minutes
- Cook Time: 40 minutes
- Total Time: 1 hour 5 minutes
- Yield: 24 servings
- Category: Dessert
- Method: Baking
- Cuisine: American
- Diet: Vegetarian
Description
Delight in these luscious Strawberry Bliss Bars, featuring a buttery oat and coconut crust layered with sweet strawberry jam and topped with both white and milk chocolate chips. Baked to golden perfection, these bars offer a perfect blend of textures and flavors for a satisfying treat.
Ingredients
Crust & Topping
- 1 ¼ cups all-purpose flour
- 3/4 cup cold salted butter, cut into small pieces
- 2/3 cup light brown sugar
- 1/4 cup granulated sugar
- 1/4 teaspoon salt
- 1/4 teaspoon ground cinnamon
- 3/4 cup sweetened shredded coconut
- 1/2 cup old-fashioned oats
Filling & Topping
- 1 ¼ cups strawberry jam
- 3/4 cup milk chocolate chips
- 3/4 cup white chocolate chips
Instructions
- Preheat Oven and Prepare Pan: Preheat your oven to 350°F (175°C). Line a 9×13-inch baking pan with parchment paper and lightly spray it with nonstick spray to ensure easy removal of the bars.
- Make the Crust Mixture: In a food processor, pulse together the flour, cold butter pieces, brown sugar, granulated sugar, salt, and cinnamon until the mixture resembles a coarse meal, about 4 to 6 pulses. If you don’t have a food processor, use a pastry blender or two forks to combine the ingredients thoroughly.
- Add Coconut and Oats: Transfer the flour mixture to a bowl and stir in shredded coconut and oats. Reserve ¾ cup of this mixture for the topping and set it aside.
- Form and Bake the Crust: Pour the remaining flour-coconut-oat mixture into the prepared pan and press it evenly into the bottom to form the crust. Bake in the preheated oven for 15 to 18 minutes, until the crust turns lightly golden. Remove and allow it to cool in the pan on a wire rack for 10 minutes.
- Apply Jam and Chocolate Chips: After the crust has cooled slightly but is still warm, carefully spread the strawberry jam evenly across the surface. Sprinkle the white and milk chocolate chips on top of the jam layer.
- Add Reserved Topping and Final Bake: Evenly sprinkle the reserved flour-coconut-oat mixture over the chocolate chips. Return the pan to the oven and bake for another 18 to 22 minutes until the topping turns golden brown.
- Cool and Serve: Allow the bars to cool completely in the pan for about 1 hour. Use the parchment paper to lift the bars out of the pan, then cut into 24 bars. Serve and enjoy this delicious treat!
Notes
- Use cold butter for the best crumbly crust texture.
- If you prefer less sweetness, reduce the granulated sugar slightly.
- For a gluten-free option, substitute the all-purpose flour with a gluten-free baking blend.
- Ensure the pan is lined with parchment paper to avoid sticking and ease of cleanup.
- Store leftover bars in an airtight container at room temperature for up to 3 days or refrigerate for up to a week.