
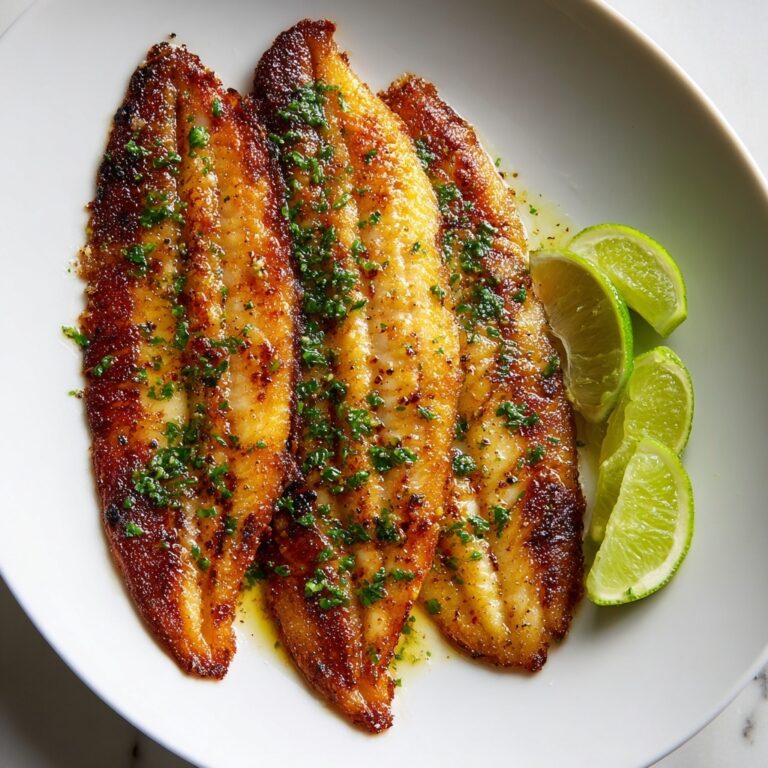
If you’re looking for a delightful twist to your snack lineup, this Dill Pickle Dip Recipe is a must-try. Bursting with tangy pickle flavor and creamy goodness, it’s the perfect companion for gatherings, game days, or whenever you crave something with a little zing. This dip balances the sharpness of dill pickles with smooth, savory elements that make every bite irresistible. Trust me, once you make this Dill Pickle Dip Recipe, it will quickly become a go-to favorite in your kitchen!
Ingredients You’ll Need
The magic of this Dill Pickle Dip Recipe lies in its simplicity. Each ingredient is carefully chosen to build layers of flavor and texture, creating that perfect creamy, tangy, and slightly crunchy dip you’ll love.
- Dill pickles: Provides the signature tang and crunch that gives the dip its vibrant flavor.
- Cream cheese: Adds a rich, velvety base that balances the acidity of the pickles.
- Sour cream: Brings a smooth, slightly tart note to keep the dip light and refreshing.
- Mayonnaise: Enhances creaminess and adds a subtle tang.
- Garlic powder: Adds a gentle depth of flavor without overpowering the dip.
- Dill weed: Boosts the fresh, herby aroma and reinforces the dill pickle taste.
- Onion powder: Complements the garlic and pickles for a well-rounded flavor profile.
- Salt and pepper: Essential seasonings for balancing all the flavors perfectly.
How to Make Dill Pickle Dip Recipe
Step 1: Prepare Your Pickles
Start by finely chopping your dill pickles to ensure they meld beautifully into the dip’s creamy base. You want them small enough to distribute evenly but still offer that satisfying crunch in every mouthful.
Step 2: Soften the Cream Cheese
Allow your cream cheese to come to room temperature so it’s easy to blend smoothly. This step is key for achieving that perfectly creamy texture without lumps.
Step 3: Mix the Base Ingredients
In a medium bowl, combine the softened cream cheese, sour cream, and mayonnaise. Use a hand mixer or sturdy spoon to blend them until silky and homogenous.
Step 4: Add Seasonings and Pickles
Sprinkle in the garlic powder, onion powder, dill weed, salt, and pepper. Then fold in the chopped dill pickles gently to keep their texture intact while making sure every bite will have their zing.
Step 5: Chill
Refrigerate the dip for at least an hour before serving. This resting time allows the flavors to marry beautifully, making your Dill Pickle Dip Recipe taste even better.
How to Serve Dill Pickle Dip Recipe
Garnishes
A sprinkle of fresh chopped dill or a few thin pickle slices on top adds an inviting look and reinforces that dill flavor. A light drizzle of olive oil can also add a pleasant sheen and richness.
Side Dishes
This dip pairs wonderfully with crispy potato chips, crunchy pretzels, fresh vegetable sticks like carrots and celery, or even spread on crusty bread or crackers for a snack that’s both cozy and bright.
Creative Ways to Present
Serve your Dill Pickle Dip Recipe inside hollowed-out bread bowls for a rustic touch. You can also portion it into mini mason jars for a grab-and-go snack or create individual dip cups for parties to keep things neat and fun.
Make Ahead and Storage
Storing Leftovers
Keep leftover dip in an airtight container and refrigerate it. It will stay fresh and flavorful for up to 4 days, giving you plenty of time to enjoy it with different snacks or meals.
Freezing
This dip is best enjoyed fresh and chilled rather than frozen, as freezing can affect its creamy texture. For best results, avoid freezing.
Reheating
Since this dip is served cold or at room temperature, reheating isn’t necessary. If you prefer it slightly warmer, let it sit out for 10–15 minutes at room temperature before serving to soften the flavors and texture.
FAQs
Can I use sweet pickles instead of dill pickles?
While you can swap in sweet pickles, it will change the flavor profile significantly. The distinct tangy punch from dill pickles is what makes this Dill Pickle Dip Recipe so special, so using dill pickles is highly recommended.
Can I make this dip vegan?
You can absolutely make vegan tweaks by substituting cream cheese, sour cream, and mayonnaise with plant-based alternatives. Just ensure your vegan pickles also align with your dietary preferences.
How long does the dip need to chill?
Chilling the dip for at least one hour allows the flavors to meld perfectly, but if you’re in a hurry, try to let it chill for at least 30 minutes for a decent flavor boost.
Is this dip good as a sandwich spread?
Definitely! This Dill Pickle Dip Recipe can add a creamy, tangy kick to sandwiches, wraps, or burgers, elevating your everyday lunch with little effort.
Can I add extra herbs or spices?
Yes! Feel free to experiment with fresh herbs like chives or parsley, or a pinch of smoked paprika for a subtle smoky depth. Just be careful not to overpower the dill pickle flavor that makes this dip shine.
Final Thoughts
This Dill Pickle Dip Recipe is a game changer for anyone who loves bold, tangy flavors paired with creamy textures. It’s a simple, crowd-pleasing dish that brings a unique twist to your appetizer spread. Whether you’re hosting friends or just treating yourself, this dip will brighten up your snack time. Give it a try and watch how quickly it becomes a beloved staple!
Print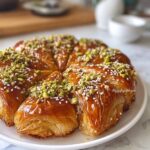
Delicious Recipe
- Prep Time: 20 minutes
- Cook Time: 30 minutes
- Total Time: 1 hour 50 minutes
- Yield: 12 servings
- Category: Bakery
- Method: Baking
- Cuisine: Middle Eastern
- Diet: Vegetarian
Description
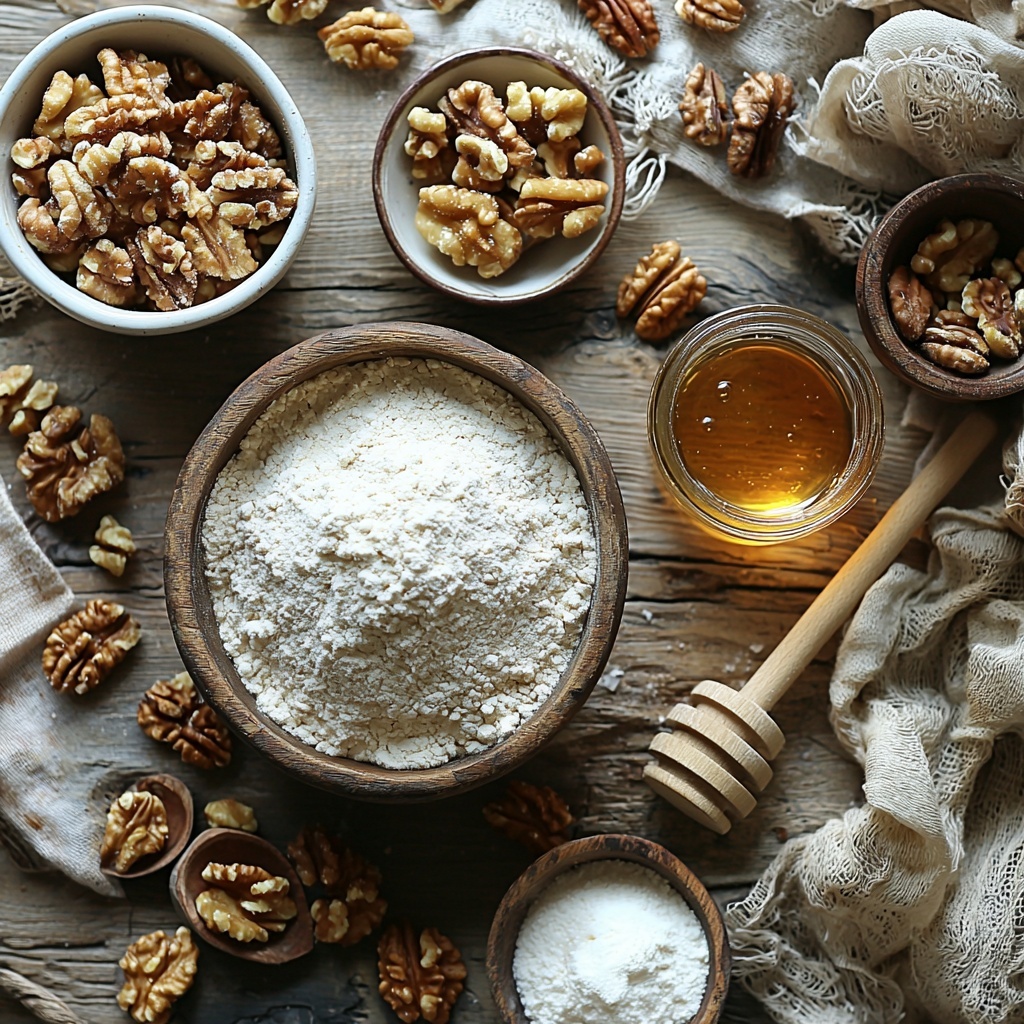
These Baklava Babka Buns are a delightful fusion of traditional baklava flavors and soft, sweet babka dough. Filled with a spiced nut mixture of walnuts or pistachios, cinnamon, and honey, these buns are perfect for a special breakfast or dessert treat. Soft, fragrant, and drizzled with honey for a sticky, luscious finish, they combine the best of both worlds in an easy-to-make recipe.
Ingredients
Dough
- 4 cups all-purpose flour
- 2 tsp active dry yeast
- ½ cup sugar
- ½ cup unsalted butter, melted
- 1 tsp salt
- 1 cup warm milk
Filling
- 2 tsp ground cinnamon
- 1 cup chopped walnuts or pistachios
- ½ cup honey
Instructions
- Activate yeast: In a bowl, mix warm milk with sugar and yeast; let sit until frothy (about 5 minutes) to activate the yeast.
- Prepare dough: In another bowl, combine flour and salt. Gradually add melted butter and the yeast mixture; knead the dough until smooth and elastic for 8-10 minutes.
- First rise: Place the dough in an oiled bowl, cover it, and let it rise in a warm place until it doubles in size, about 1 hour.
- Make filling: Mix chopped nuts with cinnamon and honey until well combined to create the flavorful filling.
- Shape dough: Roll out the risen dough into a large rectangle. Evenly spread the nut and honey filling over the surface, then roll the dough tightly into a log and slice it into individual pieces.
- Second rise: Arrange the sliced buns in a greased baking dish, cover, and let rise again for 30 minutes to ensure fluffiness.
- Bake: Preheat the oven to 350°F (175°C). Bake the buns for 25-30 minutes, or until golden brown and cooked through.
- Finish: Drizzle warm honey over the buns after baking for a sticky, sweet glaze. Serve warm and enjoy!
Notes
- You can substitute walnuts for pistachios depending on preference or availability.
- For an extra shiny finish, brush the buns with a little melted butter right after baking.
- Make sure your milk is warm, not hot, to properly activate the yeast without killing it.
- These buns keep well for 2-3 days stored in an airtight container at room temperature.
- Reheat gently before serving to bring back softness and flavor.

